Carrot and Miso Soup

Pumpkin MIso Soup Melissa Leong Fooderati

A super easy, turbo-charged veggie soup to add to your repertoire. Simply switch out the chicken stock for vegetable stock and the butter for olive oil for a hearty, healthy, vegan staple.

Ingredients

3 tablespoons vegetable oil 

3 cloves of garlic, peeled and finely chopped

2 brown onions, peeled and coarsely chopped

1 teaspoon sea salt 

1 teaspoon ground white pepper 

2 tablespoons white miso paste

10 carrots, peeled, topped, tailed and cut into chunks

Enough rich chicken or vegetable stock to cover solids (about 1.5L)

50g butter (substitute with olive oil to make this vegan)

2 tablespoons good quality EVO (I love Alto Olives)

Method

In a large saucepan, heat the 3 tablespoons of oil over low heat. Add the garlic, onion, salt, pepper, and, stir to combine and bring the heat up to medium. Sauté until the onions are translucent, but haven't taken on colour. Add the carrots and cook for a further 5 minutes. Add in the miso paste and then pour in enough stock to cover the vegetables. Bring to a simmer, then cover and cook until the vegetables collapse under the pressure of a spoon. Carefully remove the pot from the stove, add the butter and then and using a stick blender, blitz until smooth. Taste to season and serve with a drizzle of green herb oil, yoghurt and fried garlic crumbs.


Ù Tridd: The Pasta From Puglia You Need To Know

Ù Tridd Puglia Pasta

My mother Vincenza is a bit of a legend. She cooks food that seems so simple, yet is layered and nuanced and cooked with so much soul. This is a recipe from her mother Rose, it’s called ù tridd. It’s essentially a hand torn southern style pasta, laced with fresh parsley; similar to stracci (which literally translates into ‘rags’ or ‘tatters’).

Of course, you can swap out the water for stock or add garlic and more herbs to add another dimension of flavour, but then again, why mess with an OG Italian Nonna recipe? The origins of this recipe are from the Tatolli family’s town of Molfetta, which is part of the Puglia region of Southern Italy. As such, this recipe is rooted in humble ingredients; you won’t find rich butter, cream, truffles or other luxury ingredients here. Clean and simple, this is a case study in soul food.

Ingredients

The pasta

3 cups fine semolina

3 cups Tipo 00 pasta flour (plain flour will suffice if needed)

4 eggs

1 handful continental parsley leaves, finely chopped

1 - 1 1/4 cups lukewarm water (as needed)

Extra flour to roll out

The broth

2 veal shins (you can also use lamb shanks or beef ossobuco)

2 carrots, peeled and roughly chopped

2 celery stalks, peeled and roughly chopped

1 large brown onion, peeled and quartered

1 few sprigs of fresh parsley

500ml tomato sugo

Salt and pepper to taste

Finely grated Parmigiano Reggiano, to serve

Method

For the pasta, in the bowl of a stand mixer with a dough hook attachment, add the semolina, flour and eggs and turn the mixer on a low setting. When combined, add the parsley and continue to mix until combined. Gradually add water until the dough comes together. Continue mixing until the dough is no longer sticky and has become soft and pliable. Turn the dough out onto a clean, lightly floured surface and roll the dough into a log roughly 50cm long and 20cm wide. Cut sections around 3cm and pass them through a pasta roller several times so that the dough is smooth and uniform in thickness (around setting 3-4). Set aside to dry for at least 2 hours on wooden dowels… a clothes drying rack will also suffice! Once dry, tear the pasta sheets unto small pieces around the size of your pinky thumbprint. The beauty of this dish is that you don’t have to be too careful, just make sure the pieces are roughly the same size. Set aside to continue to dry out until ready to use. This pasta can be completely dried out and stored for later use.

For the broth, bring a heavy based saucepan or pot to a medium high heat and add a good slug of olive oil. When the pan is hot, sear the shanks until lightly browned on all sides. Throw in the carrots, celery and onion and parsley and stir to combine. Cook for about 3-4 minutes until the onion starts to go translucent. Pour in the sugo and then top with enough water to cover the shanks. Bring to the boil, season liberally with salt and freshly ground black pepper, then reduce to a low heat, cover and simmer for 90 minutes. Skim any fat if necessary. Season again to taste at the end. When the shanks are falling apart, strain the liquid from the solids. Reserve the meat, lightly shred, then set aside.

To serve, bring a pot of salted water to the boil. Once boiling, throw in a good handful of the pasta per person and cook for 4-5 minutes or until tender. Strain and refresh in cold water. In a separate pot, bring the deliciously meaty tomato broth to the boil. Add the cooked pasta and the shredded meat. Season to taste, then serve immediately, topped with finely grated Parmigiano Reggiano, or any sharp, hard Italian cheese, some freshly cracked black pepper and chopped parsley, if desired.


Rapid Fire Apple Crumble...For One!

Super Fast Apple Crumble For One

A lot of recipes are made for more than one...which is fine, but there are times where a perfectly formed meal for one is just the ticket. This super fast dessert came about because solo movie nights sometimes need to be a little extra. This deliciously cute apple crumble is gluten free, refined sugar free and super fast and easy to make, so instead of popcorn, try this!

Ingredients

Filling 

1 apple (I used a pink lady)

1/2 tsp vanilla bean paste

1 tsp Australian honey

1 pinch sea salt

1 pinch cinnamon

Crumble

3 tbs almond meal

1 small knob cold butter

1 pinch sea salt

1 pinch cinnamon

Method

Preheat oven to 200c. Core and chop the apple into 1 inch cubes and transfer to a bowl. Add the remaining ingredients for the filling and toss to combine. Transfer to a small ramekin so that the ingredients fit snugly, adding 2 tablespoons of water. In a separate bowl, combine the almond meal and butter and using a rubbing technique, use your fingers to rub the butter into the almond meal to form a crumb. Add the salt and cinnamon and then top the apple mixture with the crumble. Reduce the oven to 180c and bake for 15-20 minutes or until the top is golden and the apple is tender. Serve with coconut yoghurt and a drizzle of maple syrup if desired. 

A Vegan Chinese Hot Pot

IMG_9588.jpg

Ok, so by now we all know that even the most dedicated of meat eaters should probably eat a few more vegetables...not only for health, but also for sustainability of agriculture. That aside, they're bloody delicious when treated with a little love. Here's probably the simplest recipe I've ever posted, it's a Chinese-style hot pot that's full of flavour, texture and is super good for you as well, lots of protein, healthy carbohydrates and good fats to keep you full. 

Serves 1 hungry person or 2 as part of a meal

Ingredients

1/2 small brown onion, finely sliced

1/4 large sweet potato, washed and chopped into 1 inch cubes*

1 heaped tablespoon, mushroom XO sauce (from the Asian grocery aisle at most supermarkets)

100g firm tofu, chopped into 1 inch cubes (about a third of a packet, as a guide)

1/2 cup vegetable stock

1 handful fresh green or butter beans, trimmed

2 tablespoons pickled mushrooms (optional)

1-2 sprigs green peppercorns (you could use a teaspoon of dried Sichuan peppercorns instead)

Method

Preheat an oven to 200c. In a heavy based frying pan on a medium heat, add a tablespoon of vegetable oil with the onions and stir fry for 1-2 minutes until translucent. Throw in the sweet potato and turn up the heat to lightly brown the edges of the sweet potato for 2-3 minutes. Add the XO and turn down the heat, coating everything evenly. Throw in the tofu and gently stir to combine. Add a pinch of salt flakes and the stock and bring the hot pot to a simmer. Add the beans, pickled mushrooms and peppercorns, stir briefly to combine season, to taste.

Pour the hot pot into a small cast iron dish or any heavy casserole pot that 'just' fits the ingredients (you don't want a heap of space, because you want the liquid to bubble, not evaporate completely). If it's looking a little dry, top with more stock but do not cover completely. Bake for 15-20 minutes or until the top is crispy and golden and the liquid has reduced to a sauce consistency. Carefully remove and set aside until cool enough to serve. Serve with brown rice, noodles or a super fresh cabbage salad.  

*Basically, you want everything to be roughly the same size so everything cooks evenly. Bite-sized pieces are roughly what you want to go for!

Warm Peach Pudding

Baked Peach Pudding Fooderati

Everybody needs a simple, please everybody pudding you can quickly throw together when entertaining, or just because. This baked pudding is part cake, part cobbler, with golden, almost crunchy bits on the outside and fabulously crumbly and cakey on the inside. And the best bit is you can use any fresh or tinned fruit you like. You could even swirl a few spoons of your favourite jam in, instead! 

Batter

125g butter, softened 

125g caster sugar

2 large free range eggs

125g self raising flour 

Pinch of salt 

Syrup

2 tablespoons brown sugar 

120ml water

1 vanilla pod

Fruit of choice, I used 3 large fresh peaches, but you could you can use almost any fruit you like. Stone fruit, citrus, pears or poached quinces work well. 

Method 

Preheat oven to 180c. Meanwhile, combine the butter, sugar and eggs in a stand mixer and whisk until thick and glossy. Sift in flour gradually and combine thoroughly. 

Thoroughly combine the syrup ingredients in a saucepan, add the fruit and poach over a medium heat for 5 minutes, tossing the fruit around so that it is evenly covered in the syrup. Transfer most of the poached fruit and a spoonful of the syrup to a lightly greased and floured baking dish. Spoon the batter over the top of the fruit and shake the pan a little bit so that everything settles evenly. Add the rest of the fruit on top, nestling it in a little. 

Bake for 30 minutes. Let rest for a few minutes before serving. Serve warm with whipped cream, custard or ice cream. 


Simple Spiced Carrot & Pumpkin Soup

Spiced Carrot and Pumpkin Soup.jpg

In life, quick and easy rarely equates to good, but in this case, that rule doesn't apply. As the weather mercifully cools, it's time to add to your soup arsenal...and this warming and aromatic spiced carrot and pumpkin soup is a great one to add to your hit list. 

Ingredients

3 tablespoons vegetable oil 

2 tablespoons coriander seed

3 cloves of garlic, peeled and finely chopped

2 brown onions, peeled and coarsely chopped

1 teaspoon sea salt 

1 teaspoon ground white pepper 

1 tablespoon brown sugar 

1 teaspoon five spice powder

10 carrots, unpeeled, tops removed, cut into chunks

1/2 Jap pumpkin, skin and seeds removed, cut into chunks

Enough rich chicken or vegetable stock to cover solids (about 1.5L)

50g butter 

2 tablespoons good quality EVO (I love Alto Olives)

Method

In a large saucepan, heat the 3 tablespoons of oil over low heat, then add the coriander seeds and toast until aromatic. Add the garlic, onion, salt, pepper, sugar and five spice, stir to combine and bring the heat up to medium. Sauté until the onions are translucent, but haven't taken on colour. Add the carrot and pumpkin, and cook for a further 5 minutes. Pour in enough stock to cover the vegetables and bring to a simmer. Cover and cook until the vegetables collapse under the pressure of a spoon. Carefully remove the pot from the stove and using a stick blender, blitz until smooth. Taste to season and serve with a drizzle of olive oil. 


Mama Vincenza's Italian stuffed squid

Calamari al forno.jpg

On a recent trip to South Australia to visit my in-laws, I managed to consume heroic amounts of food cooked by my incredible Italian mother-in-law, because Italians know no other way than to feed family. Vincenza's family is from Molfetta, part of the region of Puglia (the bit that forms the heel of the boot) in southern Italy and the region is known for its incredible seafood produce. In true Italian home cook style, the recipes she cooked were passed down from her mother, and mostly exist in the heart, instead of on paper. Vincenza's stuffed squid is a dish my husband Joe has drawn inspiration from over the years, and it is truly one of the most simple, delicious things you can learn to cook when it comes to squid. She calls it 'calamari al forno', I call it delicious.

Serves 4

Ingredients

1/4 small bunch of Continental parsley, leaves picked

4 cloves garlic, finely sliced

2 tbs olive oil

1 1/2 cups fresh breadcrumbs

1/2 cup rice crumbs

50g Parmigiano Reggiano cheese, finely grated

The juice of half a lemon (reserve the zest)

4 large eggs

8 medium (or 4 large) squid tubes, cleaned

1 brown onion, finely sliced

1 large jar passata (680g) 

Black pepper and salt, to taste

Method

Preheat an oven to 160c. In a deep baking tray or casserole dish, evenly spread about a third of parsley leaves and garlic slices along with the olive oil in the base of the dish. In a clean mixing bowl, combine the crumbs, cheese, lemon juice, eggs and the rest of the parsley and garlic into a bowl and mix well to combine. The mixture should resemble a soft, pliable dough. Add a little water or more breadcrumbs to achieve the consistency if needed. Season well with salt and pepper. This egg and crumb mixture also works well as a bread dumpling/meat-free alternative to meatballs when cooked in tomato sauce. 

Fill each squid tube with the breadcrumb mixture (it will expand when cooked, so take care not to overstuff), then place in the baking tray. Continue until all the squid tubes are stuffed. Scatter the sliced onion and the reserved lemon zest over the top of the squid, then pour the passata over the top of the squid, adding a little water to the mixture if required, to ensure the squid are more or less covered. This will prevent the squid from drying out while cooking, but reduce into a rich sauce by the time it's done. Season with more black pepper and salt. 

Bake in the oven for one hour, then remove and allow to cool and garnish with more parsley and lemon zest before serving. This dish serves as an excellent antipasti, served cold the next day, sliced and dressed in olive oil and lemon juice. 


Sweet Potato Chocolate Cake

As seen on Everyday Gourmet Season 8 with Justine Schofield. Watch the segment HERE!

As seen on Everyday Gourmet Season 8 with Justine Schofield. Watch the segment HERE!

Say what? Yes, the secret ingredient in this chocolately, fudgy little number is SWEET POTATO! So what does it do? Well, instead of using regular flour and heaps of refined sugar, sweet potatoes add natural sweetness, a rich texture and a heap of vitamins, minerals and beneficial fibre to this cake...so you can have your goodness and eat it too! 

A tweaked version of my friend and nutritionist Tara Leong's recipe, it's super simple, as well as gluten (if you use gluten free baking powder) and dairy free. As she would note, however...just because it's healthy doesn't mean you should eat the whole thing! Nutrient dense foods also come with a decent serve of calories, so enjoy it with a little moderation! 

Ingredients

1 large sweet potato, roasted in its skin and slightly cooled (around 1kg)

85g dark chocolate

3 free range eggs

1 1/2 cups coconut sugar (brown sugar also works)

1 tsp vanilla extract

1 cup olive oil

1/2 cup raw cacao powder (not cocoa powder...you want that bitter chocolately kick!)

1 1/2 tsp gluten free baking powder (regular is also fine if this isn't a crucial dietary)

3 tsp cinnamon

A good pinch of sea salt

200g almond meal

Raw chocolate glaze

1 cup raw cacao powder

1 cup water

6 tbsp runny honey or maple syrup (raw cacao can be bitter, so you can add more to taste)

1/2 tsp vanilla extract

1/2 tsp cinnamon

1/4 cup olive oil

Method

Preheat your oven to 180c, then grease and line a 23cm springform or a deep loaf tin with baking paper. Slice the cooked sweet potato in half and scoop out the flesh, transferring it into a bowl. Mash the sweet potato roughly and set aside. Bring a small saucepan half filled with water to the boil. Once boiling, place the chocolate in a heat proof bowl and carefully place on top of the saucepan. Once melted, remove from heat and set aside. In a separate bowl, whisk together the eggs, sugar, vanilla and oil, then slowly add the sweet potato, melted chocolate and mix until just combined. Sift in the cocoa, baking powder, then add the cinnamon and salt. Lastly, fold in the almond meal in thirds until everything is incorporated. Transfer the contents of the cake to the lined baking tin and bake for 65 minutes or until a toothpick when inserted in the centre, comes out clean (as it is a very fudgy cake and not all sweet potatoes are the same size, it can sometimes take a little longer, just keep cooking until the toothpick comes out clean!). Once baked, remove from oven and set aside to completely cool before icing. 

For the ganache, combine the cacao powder, water, maple syrup (you ca also use honey or rice malt syrup), vanilla and cinnamon over a medium high heat, whisking until the mixture thickens. If the mixture is already very thick, add a little water to loosen it, a tablespoon at a time. Once thick enough to coat the back of a spoon, remove the ganache from heat and vigorously whisk in the olive oil until smooth and glossy. For a mirror glaze finish, add in an extra tablespoon or two of iced water at the end and whisk vigorously again until combined. Once the cake is cool, remove it from the tin, then glaze and decorate. 


Chicken, Ginger, Sweetcorn & Egg Drop Soup

As seen on Everyday Gourmet with Justine Schofield Season 8

As seen on Everyday Gourmet with Justine Schofield Season 8

There are certain dishes you need to learn when you move out of home and start cooking for yourself. I would highly advise 1. A good hangover cure (mine's a 3 cheese toastie with heaps of black pepper and Dijon mustard), 2. Something to impress any guest (a cracking roast chicken is a solid submission), 3. A mid-week no-brainer (my braised lentils with bacon as seen in Good Food)...and 4. A sick-remedy cure-all. 

While I've painstakingly perfected my Jewish Chicken Soup, I've evolved my mum's chicken and sweetcorn soup over the years for maximum ease (handy when you're the sick patient in question), speed (takes about 15 minutes all up) and deliciousness (even less than that to slurp down). It is, also ideal as a quick and healthy snack even if you're not ailing. 

Watch the how-to below!

Makes 4 serves

Ingredients

8 cups chicken or vegetable stock (bonus points if you make it yourself!)

4 chicken thighs, skin off

1 thumb sized knob of ginger, peeled and finely sliced

1 x 410g tin creamed corn

1 x 125g tin corn kernels

1 egg, lightly whisked

Sea salt flakes

White pepper

1 stalk spring onion (scallion), finely chopped into rounds

Sesame oil

Method

In a large pot, add the stock and ginger, then bring to a boil. Carefully add the chicken thighs and simmer for 15 minutes or until the chicken is tender and cooked through. Carefully remove the thighs and allow to cool slightly before handling, then coarsely chop, or shred the meat. Return the chicken pieces to the stock, then add the creamed corn and corn kernels. Bring the soup back to the boil and when it has reached a rolling boil, slowly pour in the egg mixture a little ribbon at a time, gently stirring through the soup as you go (the egg flowers will form while gently moving around the soup - too slow and you'll have a rubbery clump, too fast and you'll just have a cloudy soup). Continue until all the egg is poured into the soup. Season to taste with salt and white pepper, then remove the soup from heat to cool slightly before serving.

To serve, garnish with more white pepper, a few drops of sesame oil and the chopped spring onions. Feel the life flooding back into your body!

4 Ingredient No Bake Coconut Crack Bars

As seen on Everyday Gourmet with Justine Schofield and Melissa Leong

As seen on Everyday Gourmet with Justine Schofield and Melissa Leong

A new year rolls around, as does the guilt for potentially overdoing it between Christmas and New Years, even though it's probably worth the argument that it's really what you eat between New Years and Christmas that's more important. 

But anyway, I digress. Once the sugar high from all your favourite end of year desserts comes to an end (personally, I'm a pavlova and trifle girl), here's a slightly more virtuous afternoon tea accompaniment that's vegan as well as gluten, refined sugar and dairy free...but be warned, they are called Crack Bars for a reason. There is zero baking involved and the base recipe is just 4 ingredients (I don't count salt), which you can add your favourite toppings or ingredients like pepitas and raw chocolate (pictured), cacao nibs, dried fruit, etc. Enjoy! 

Ingredients

1 cup dessicated coconut

1/4 cup maple syrup (honey will work, but isn't vegan if that matters)

2 tbsp coconut oil, melted

1/2 tsp vanilla extract

1 pinch sea salt

Optional: a handful of pepitas, raw chocolate to drizzle. 

Method

Place the dessicated coconut into a mixing bowl. In a separate bowl, combine the melted coconut oil, maple syrup and vanilla extract. Add the wet ingredients to the dessicated coconut, along with a good pinch of sea salt and combine well. At this stage, you can add any additional  ingredients you like, for example, a handful of chopped nuts, cacao nibs, pepitas, or dried fruit.

Line a shallow baking tray with baking paper and press the mixture into a level rectangle shape, alternatively you can use silicon ice cube moulds. Freeze the pressed mixture for 10-20 minutes until set, then slice into portions, or pop out of the mould, if using. If you want to drizzle a little melted chocolate (raw or otherwise, I don't discriminate), this is when you'd do that (and let's be honest, when is a little extra chocolate a bad idea?).

Store refrigerated. 


Dan Dan Noodles

DanDanNoodles.jpg

I truly believe I have a separate stomach for dumplings and noodles. Not so much for cake, but definitely for savoury things of the Asian persuasion. One of my favourite quick lunches in Melbourne is Le Ho Fook's take on Dan Dan Noodles...a dish from Sichuan origins, with a recipe that is notoriously fought over for whose is better and/or more authentic. This is by no means the most legit version you will find out there, but it's a faithful enough representation that's easy to pull off at home without too much trouble, with delicious results. Enjoy! 

Ingredients:

Noodle sauce

3 tbsp tahini

1 tbsp sesame oil

1 tbsp light soy

1 tbsp Chinese black vinegar

2 tbsp Lao Gan Ma chilli flakes in oil

1 tbsp Mushroom XO sauce

1 bird's eye chilli, finely chopped

2 tbsp Sichuan peppercorns, toasted and blitzed

1 tbsp mild chilli flakes

1/2 tsp Japanese togarishi powder

1/2 tsp ground white pepper

Castor sugar, to taste

125ml chicken or vegetable stock, added as needed

Seasoned mince

1 large thumb-sized piece of ginger, finely chopped

2 cloves garlic, peeled and finely chopped

500g pork mince (not too lean!)

2 tbsp Shaoxing Chinese cooking wine

1 tbsp dark soy

3-4 tbsp ya cai (Sichuan pickles, from Asian grocers and regular supermarkets), finely chopped

The rest

Guan Miao dried noodles (or fresh medium width lo mien noodles, from Asian grocers)

1 bunch bok choy, blanched and refreshed

2-3 stalks spring onion (scallions), finely chopped into trounds

1 small Lebanese cucumber, julienned

Japanese togarashi powder

For the noodle sauce, combine all ingredients except for the stock and mix well. Add the stock, a  little at a time, until you reach a smooth, spoon-coating texture (like runny honey). Season to taste with sugar, salt or chilli, but it should be spicy and numbing. 

For the mince, add vegetable oil, ginger and garlic to a pan on medium high heat and continually move the ginger and garlic around to minimise it sticking to the pan. Once fragrant (about 1 minute), add the mince and brown in batches if necessary. Add Shaoxing wine and soy and season to taste. Transfer the mince to a bowl and stir fry the pickles in a little more vegetable oil for 1-2 minutes. Combine with the mince and set aside to cool. 

When ready to eat, bring a large pot of water to the boil and add the noodles. Cook until al dente, then drain and refresh in cold water. Transfer to a large bowl and spoon over enough noodle dressing to coat the noodles. Transfer into bowls and add the blanched bok choy. Top with the mince and garnish with the spring onions, cucumber, togarashi...you can add some fried shallots or peanuts for extra crunch, too.


Beef Rendang Meat Pies

Almost every culture in the world has a meat pie and this is another one to add to your delicious repertoire. #BringBackTheClassics

Makes: About 8 party pies

Preparation time: 40 minutes

Cooking time: 4 hours 20 minutes

Level of difficulty: medium

Ingredients

Rendang paste
1 tbs coriander seeds
2 thumb-sized pieces of fresh turmeric
1 generous knob of galangal, peeled and coarsely chopped
2 red eschallots, peeled and halved
3 bird's eye chillis (de-seeded if you prefer a milder heat)
1 thumb-sized piece of ginger, coarsely chopped
1/2 stalk of lemongrass, coarsely chopped
2 green shallots (scallions), topped and tailed
1 tsp white mustard seeds
½ cinnamon stick
1 candlenut

The rest
500 g beef oyster blade, chopped into bite sized chunks (beef chuck, lamb neck or shanks also work well)
270 ml tin coconut cream
1 tbs kecap manis

Salt

White pepper

4 sheets short crust pastry

¼ milk for glazing

Crispy chilli oil, or your favourite sauce, to serve

Method

Preheat an oven to 180˚C. Blitz the paste ingredients in the blender or food processor until you achieve a rough paste (add a small amount of water to the paste if it has issues combining). In a heavy based pot on a medium heat, add a slug of olive oil and stir fry the paste for 2-3 minutes, until aromatic. Stir the mixture continuously to prevent it catching on the bottom. Remove the paste from the pot and set aside while you brown the meat. 

Add a little more oil, then in batches, brown the meat on all sides. Once all the meat is browned, return all of the meat to the pot, along with the paste and stir to combine. Add in the coconut cream and ketchup manis and combine well. Bring the curry to a simmer, taste and season with salt and ground white pepper and place the lid on the pot. Place the pot in oven and reduce the temperature to 120˚C for 4 hours.

When the time is up, remove the pot from the oven and check the meat. The meat should be soft enough to break apart with a spoon. When the meat is done, place the pot on the stove on high heat with the lid on for 15-20 minutes to reduce the sauce and thicken the texture. Once thickened, taste and adjust seasoning if necessary, then set aside to cool. Refrigerate overnight if possible.

When you’re ready to make your pies, preheat the oven to 200˚C. Thaw the pastry and cut it to fit the base and sides of your pie moulds. For party pies, a deep muffin tray works well. Fill each pastry case with the rendang and top with a pastry lid. Use a fork to crimp the edges to seal, then glaze with milk. Cook for 20 minutes or until the tops are golden. Set aside to cool slightly, then serve.

Note

Make the rendang a day ahead and refrigerate it…it’ll be easier to work with while slightly cold, and next day stews always taste better!

SBS cook’s notes

Oven temperatures are for conventional; if using fan-forced (convection), reduce the temperature by 20˚C. | We use Australian tablespoons and cups: 1 teaspoon equals 5 ml; 1 tablespoon equals 20 ml; 1 cup equals 250 ml. | All herbs are fresh (unless specified) and cups are lightly packed. | All vegetables are medium size and peeled, unless specified. | All eggs are 55–60 g, unless specified.

 Photography, styling and food preparation by Melissa Leong

Feeling nostalgic? We want you! For the month of November, SBS Food is asking food lovers far and wide to get creative by putting a multicultural twist or your creative spin on an Australian classic... Welcome to #BringBackTheClassics - enter now!


Tom Yum Sausage Rolls

Adding a Thai twist to one of Australia’s favourite meaty pastries, lemongrass and ginger add zing, while the shrimp paste and coriander adds to that savour flavour we all love. Best of all, you already know this recipe…just add (tom) YUM!

Makes: About 16 rolls 

Preparation time: 15 minutes

Cooking time: 25 minutes

Chilling/freezing time: 20 minutes

Level of difficulty: easy

Ingredients

 500 g pork and veal mince

2 tbsp tom yum paste

1 small carrot, peeled and finely chopped

1 brown onion, peeled and finely chopped

1 stick celery, finely chopped

1 clove garlic, minced

1 tbsp potato starch

½ tsp ground white pepper

2 sheets frozen puff pastry, partially thawed

1 egg

Nuoc cham (or if you’re feeling super Aussie, sweet chilli) sauce, to serve

Method

In a large mixing bowl, combine the mince, tom yum paste, carrot, onion, celery, garlic, potato starch and white pepper and mix well with clean hands to combine until everything is emulsified. Throwing the mixture vigorously against the side of the bowl or on a clean bench top will help. Work quickly, keeping the mixture as cool as possible, then cover and refrigerate until needed. When you are ready to assemble, place a sheet of thawed puff pastry onto a clean surface and cut in half, lengthways.

Remove the sausage mixture from the fridge and roll a log about 2.5cm in thickness and place it lengthways onto the pastry, closer to one edge. Carefully roll the pastry, making sure the filling is snug to the pastry with no gaps, and seal the edge where the pastry meets with egg yolk. Set aside in freezer to allow the mixture to firm up.

Repeat until you have used all of the filling. When ready to cook, preheat the oven to 200˚C. Remove the sausage roll logs from the freezer and allow them to thaw slightly. Cut into desired size, brush with remaining egg yolk and place on a baking tray lined with baking paper.

Bake for 20 minutes or until the pastry is golden. Set aside to cool slightly, then watch them disappear!

Note

Tom yum paste can be found in the Asian aisle of most major supermarkets and Asian grocery stores. Because the paste is very salty, there’s no real need to season with additional salt. These sausage rolls work really from frozen to the oven, so make a batch ahead of time and just pop them in the oven when unexpected hungry visitors come calling.


Vegan Chocolate Mousse

Vegan Chocolate Mousse.jpg

Instagram is a wonderful thing for inspiration. It's also terrible for creating unrealistic expectations about everything from diet to body image, but that's a conversation for another time. A dear friend and chef Sharon Salloum from Sydney's Almond Bar (if you haven't been, you really should) recently posted a vegan chocolate mousse she had made. Being a chef and then running into health issues is never ideal, but it happens more than you think. Having to change what we eat out of necessity does create an opportunity to explore new things however, and while I could never EVER be vegan, that isn't to say that recipes that don't involve animal products can't be delicious. Case in point, this extremely rich and velvety chocolate mousse. Chances are you already have most of these ingredients at home anyway, so why no, eh?

Serves 2

Ingredients

1 ripe avocado

1/2 frozen banana

2 tbs cacao powder

1 tbs vanilla protein powder (I used Tropeaka Lean Protein, but this isn't a sponsored post)

1 tsp maple syrup or rice malt syrup (you could use raw honey for a vegetarian option if you don't want to go fully fledged vegan)

1 pinch sea salt

1 tbs coconut yoghurt or almond milk (optional, if the ingredients get a bit too thick to blend)

Cacao nibs and other fun things, for garnish

Method

Throw all your mousse ingredients into a high speed blender. Blitz until smooth (here's a recipe where 'rustic' chunks of avo probably aren't so appealing). The frozen banana means the mousse is pretty much ready to eat out of the blender, but I recommend decanting it into a bowl and chilling it in the refrigerator for about 20 minutes or until ready to eat. Garnish with your favourite toppings and a little extra pinch of sea salt. 


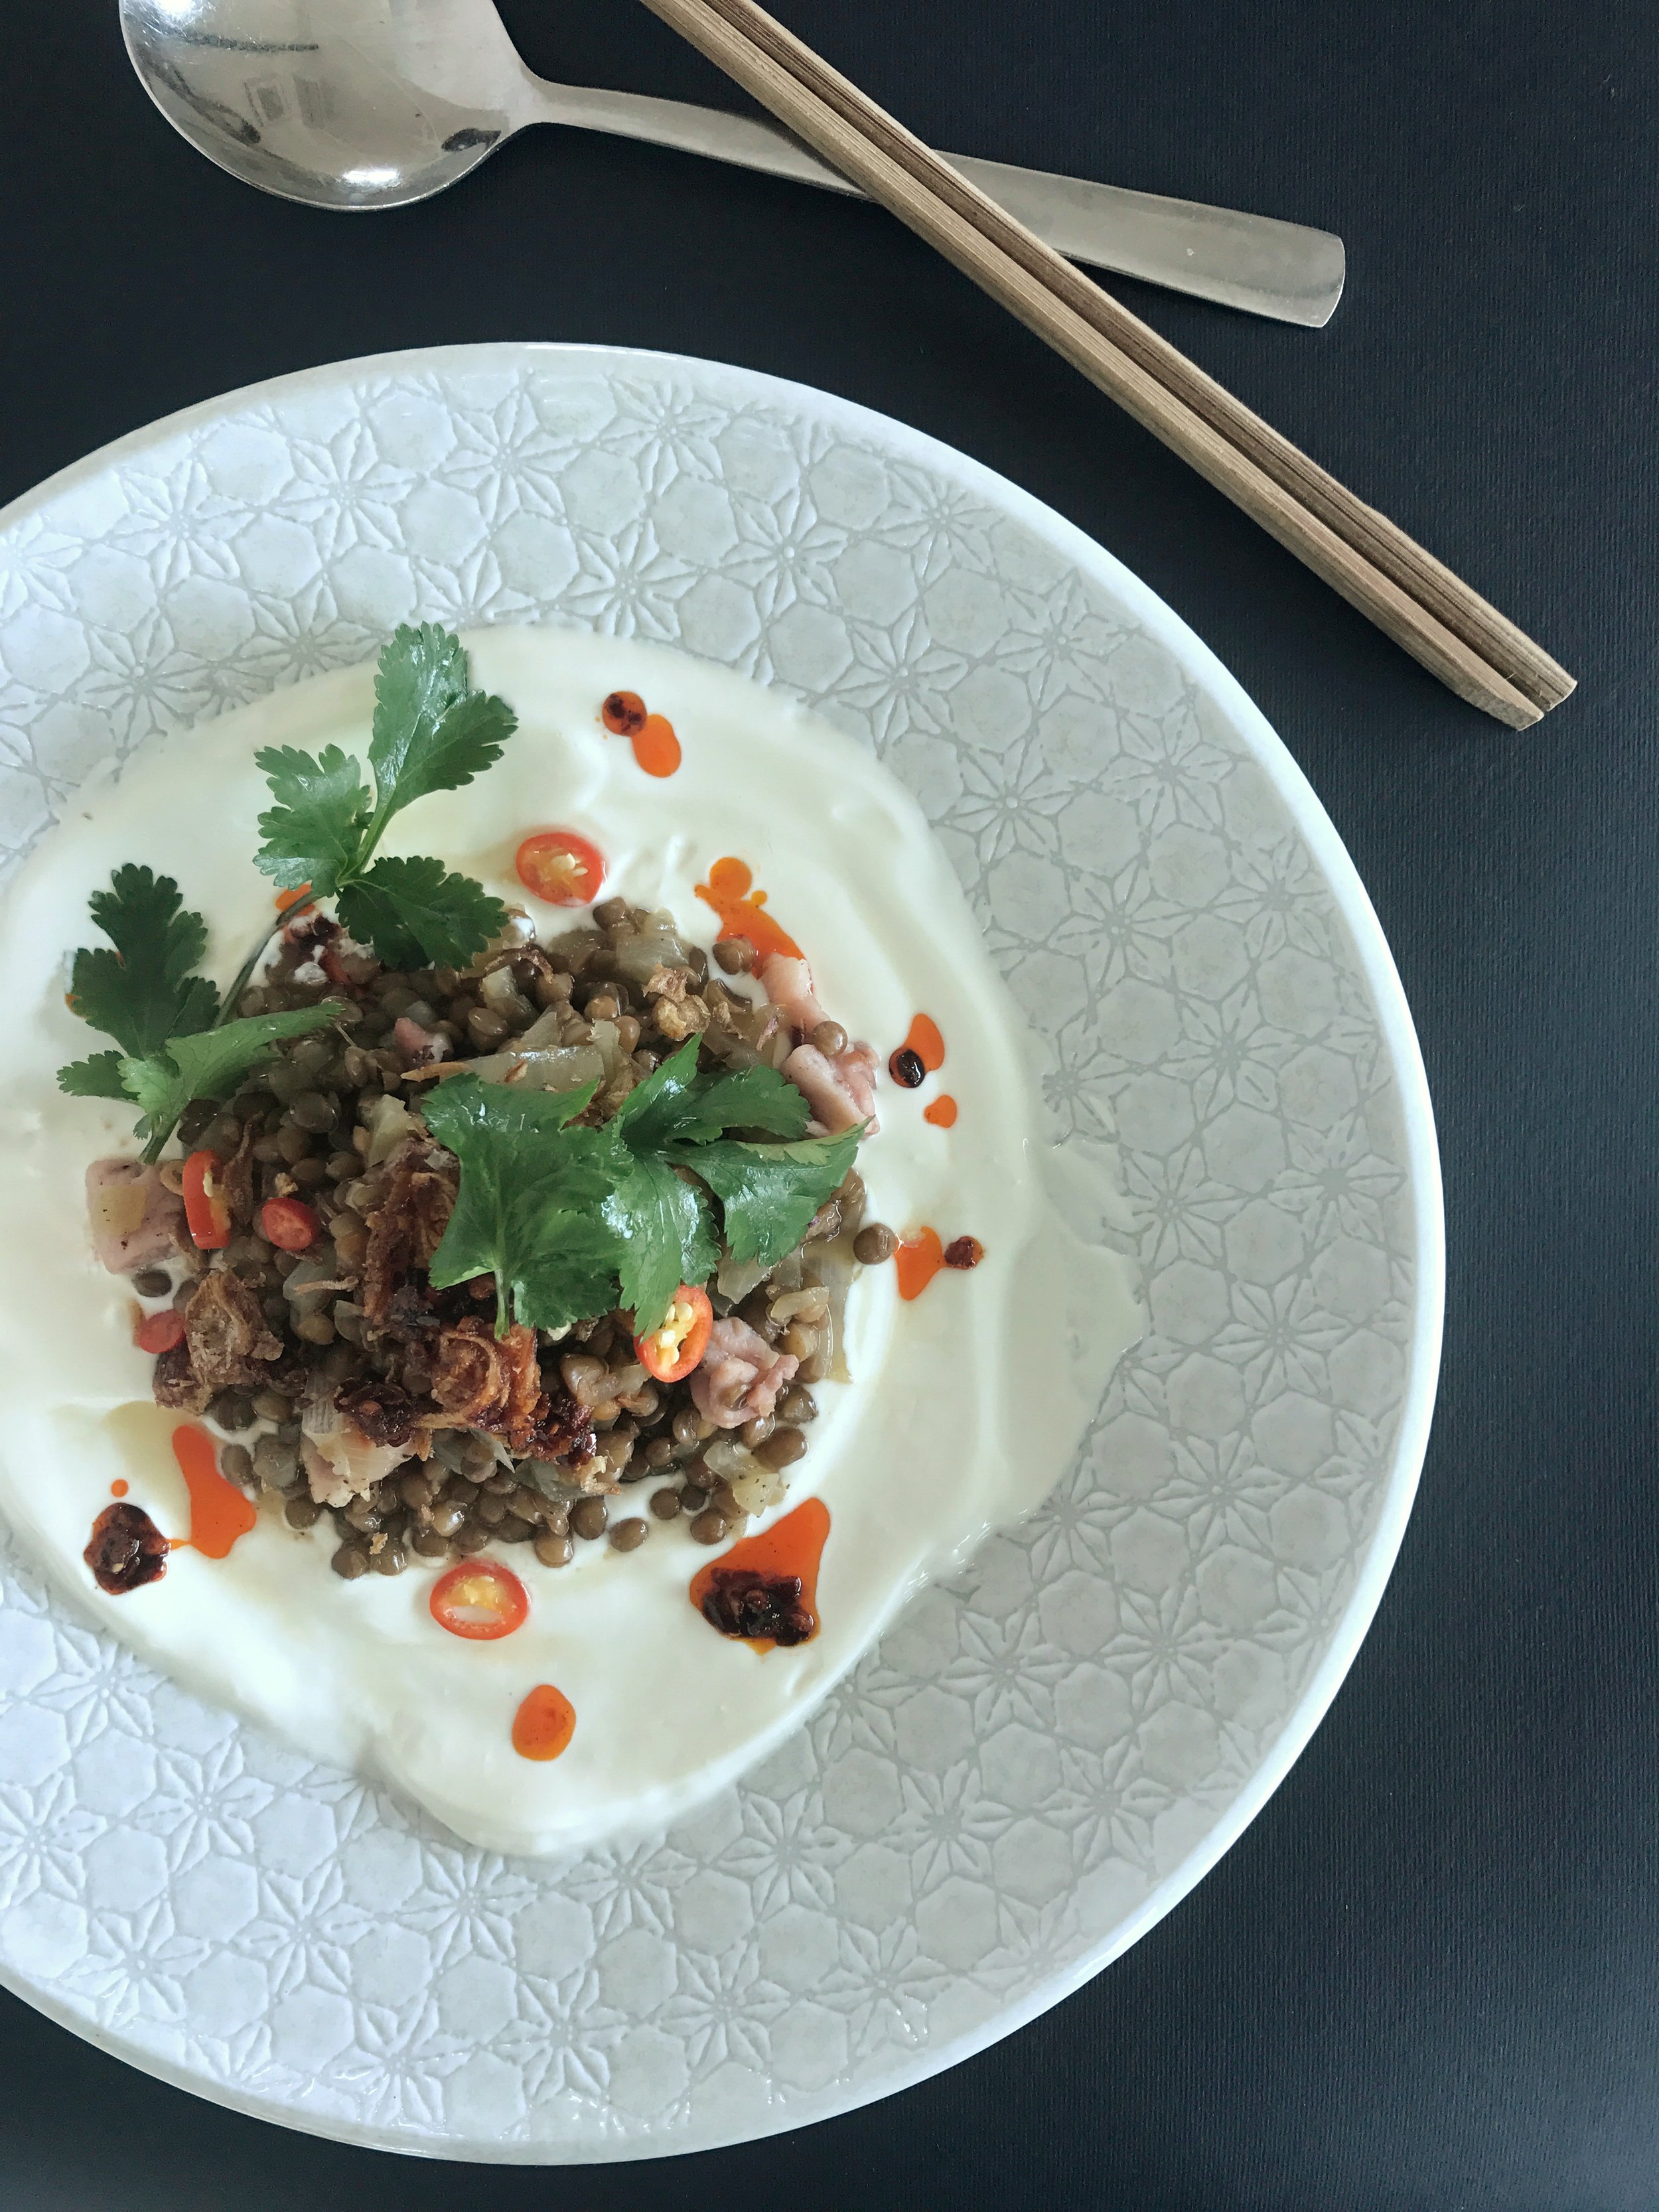
Lentils with Bacon, Chilli Oil and Fried Shallots

As published in Good Food

As published in Good Food

It can be so tempting these days when you're feeling lazy and hungry, to pick up the phone, tap on an app and order delivery. It's not bad, and there are definitely times where the convenience of take out can really save you. There is something to be said though, for developing an arsenal of super fast recipes that you can whip up at a few minute's notice, and let's be frank, are probably a lot healthier and more satisfying than take out. 

Good Food Story September 2017

I was recently asked for Good Food what I'd do with a tin of lentils... so here 'tis! It takes about 10 minutes from go to whoah and is full of protein, fibre and of course, a tonne of flavour. 

Ingredients

1/2 brown onion, peeled and finely diced

1-2 cloves garlic, minced

1 rasher bacon, diced

1 tin lentils, drained and washed

1 cup chicken stock

2 tablespoons Greek yoghurt

1 teaspoon chilli flakes in oil

Fried shallots for garnish

Coriander leaves for garnish

In a frying pan on medium heat, sweat the onion, bacon and garlic in a little olive oil for 2 minutes or until the onion is translucent. Add the lentils and stir to combine everything. Pour in the stock, reduce the heat to low and allow to simmer for 5 minutes or until the stock has mostly evaporated. Set aside to cool slightly. On a serving plate, spread the yoghurt over the base, the spoon over the lentils. Top with the fried shallots and chilli oil and coriander leaves and serve.

Stinging Nettle Soup

Nettle Soup.jpg

Green things are making an appearance in vegetable town...spring has mercifully rolled around and what a glorious thing that is for the litany of new season vegetables to have at your cooking disposal. Over the weekend, a friend dropped off a box of incredible spring vegetables from a Victorian producer that supplies his restaurant, and among the emerald harvest, a huge bunch of stinging nettles. 

I love a produce box challenge, because it really lays out the gauntlet for testing your cooking skills...or failing that, your research ability. Stinging nettles are one of those ingredients that make a miraculous transformation from shitty weed to verdant edible without too much trouble or expense. Have some latex gloves handy to avoid the burn, but here's a classic nettle soup recipe you can test out...whether yours are found at the farmer's market...or your next nature walk (just be sure to wash thoroughly and go slightly off the track if there are dogs around!).

Ingredients

50g butter

1 brown onion, peeled and chopped

1/2 leek, thoroughly washed and chopped

2 carrots, peeled and chopped

4-5 medium potatoes, washed, peeled and chopped into 1 inch cubes

1 bunch spinach or kale leaves (optional)

1 bunch stinging nettles, washed and any woody stems removed

2-3 cups chicken or vegetable stock

Salt and pepper

Method

In a large pot on a medium heat, add the butter and once melted, add the onion, leek, carrot and potato. Sauté for 2-3 minutes or until the vegetables have softened but haven't taken on any colour. Add in 1/2 each of the greens and nettle leaves and sauté until slightly wilted. Add stock and season with salt, then simmer for 15-20minutes or until the potato is is cooked through. Add in the remaining greens and nettles (reserving some greens till the end will ensure a more vibrant green soup). Carefully remove the soup from heat and using a stick blender, blitz until smooth. 

Return the soup to the heat and reduce to your desired consistency and season to taste. Serve with a dollop of Greek yoghurt or creme fraiche. 

Marmalade and Ricotta Teacake

Marmalade Ricotta Cake.jpg

When I lived in rural Tasmania for two years, I had the great fortune of living for part of that time on an organic sheep dairy. Owned by my dear mate Nicole Gilliver, her mother Diane Rae and their amazing family, Grandvewe Cheeses is situated in Birchs Bay, located an hour south of Hobart overlooking Bruny Island. 

One of the perks of being mates with a cheesemaker...is obviously access to cheesy delights...including recently, a huge wedge of sheep milk ricotta. With zero preservatives, the shelf life of produce like this is extremely short, and without wanting to waste it, I decided to bake what I didn't use into a ricotta cake. Add to this a couple of tablespoons of my mother in law's excellent home grown cumquat and blood orange marmalade, this cake was made with a whole lotta love. 

It's a not-too-sweet, citrusy slice is great as an afternoon tea accompaniment and is even better served with a dollop of yoghurt or creme fraiche. 

Ingredients

250g fresh ricotta

2/3 cups caster sugar

2 large organic eggs

100g butter, melted

Zest and juice of 2 lemons

1/4 cup orange juice

1/4 cup almond meal

1 1/2 cups self raising flour, sifted

1 pinch salt

1 tsp ground cinnamon

2 tbs marmalade

Icing sugar, for dusting

Greek yoghurt or creme fraiche, to serve

Method

Preheat an oven to 180c. In a food processor, add the ricotta, sugar and eggs and blitz until smooth. Pour in the butter, lemon zest, lemon juice and orange juice and pulse again, to combine. In a clean mixing bowl, add the almond meal, flour, salt and cinnamon and stir to combine. Gently fold the dry ingredients into the wet ingredients, about a third at a time, until combined.

Line a 20cm spring form tin with baking paper and pour the batter into the tin. Shake to level and then carefully swirl in the marmalade, then even out the top. Bake for 35-40 minutes or until a skewer inserted into the centre comes out clean. Allow to cool for 10 minutes before releasing the cake from the springform, and rest on a rack until cool. Dust with icing sugar and serve with yoghurt or creme fraiche. 


Fast and Furious Raid-The-Fridge Leftovers Fried Rice

As seen on Channel 10's The Cook's Pantry with chef Matt Sinclair

As seen on Channel 10's The Cook's Pantry with chef Matt Sinclair

Nobody in the history or cooking rice, ever makes exactly the amount they need. There are always leftovers, which are perfect for making fried rice. I love this dish because it makes short work of throwing together a hot and delicious meal and is a resourceful way of using up leftovers and elevating vegetables that are perhaps past their prime, to new heights. This is a great meal for anytime of the day, from a quick and nutritious snack, to a full-on feast. Add it to your mid week arsenal! 

Serves 2 as a main meal or 4 as part of a feast

Ingredients

2 rashers middle bacon, rind removed, coarsely chopped

1 thumb sized piece ginger, finely chopped

2 cloves garlic, finely chopped

2 stalks shallot (scallion), trimmed and finely chopped

2-3 cups day old boiled/rice cooker rice

1 cup leftover veggies, chopped into 1cm pieces (leftover roasted veg like carrots and Brussels sprouts are great, as are frozen peas or tinned corn)

1 tablespoon kecap manis

1 tablespoon Lau Gan Ma chilli flakes in oil

2 free range eggs, lightly whisked with a fork

Salt and white pepper

A handful fresh beansprouts, to garnish

Method

In a hot wok, add the bacon and stir fry until golden. Add in the ginger, garlic and shallot and stir fry until translucent, but not browned. Throw in the rice and use the spatula to break it up to remove any clumps, then stir fry for 2-3 minutes to allow the rice to take on the flavours and reheat.

Throw in the vegetables, then the kecap manis and chilli flakes in oil (to taste). Bring the wok back up to a high heat, then, in a gradual ribbon, pour in the egg, tossing/stir frying the ingredients constantly, to evenly distribute the egg throughout the rice. The egg will cook very quickly and will continue to cook off the heat from the residual heat in the wok, so it’s important not to overcook. Season with salt and pepper to taste and remove from heat. Serve with fresh beansprouts and more chilli oil on top. 

To make this dish more substantial, or to use up any leftovers, you could also add in leftover cooked meat such as roasted chicken or pork, or tofu.

Hainanese Chicken Rice

As seen on Channel 10's The Cook's Pantry with chef Matt Sinclair

As seen on Channel 10's The Cook's Pantry with chef Matt Sinclair

If I had to choose a death row meal, this would, without a question, be it. The succulent chicken, richly aromatic rice and punchy ginger and scallion relish is all kinds of magic in one bite. I learned how to make this dish from my mother and it's not only time honoured in our family, but a love letter to our Singaporean heritage. Love it, as I do, served at room temperature with plenty of hot broth on the side, no matter what the weather. 

Serves 4

Ingredients

1 whole free range chicken (the quality shows in a dish like this)

1 bunch shallots (scallions)

1/2 bunch coriander, thoroughly washed

A couple of knobs of ginger (it will be used in 3 parts of this recipe, so make sure there’s lots)

1 head garlic (make sure the cloves aren’t too small)

White pepper

Sesame oil

Chinese five spice powder

2 cups jasmine rice, rinsed thoroughly about 3 times to remove as much starch as possible.

Table salt

To serve

Kecap manis

Sambal olek 

1 Lebanese cucmumber, sliced

2 vine ripened tomatoes, sliced

Method

In a colander, thoroughly scrub the chicken inside and out with a handful of salt (the secret to smooth Hainanese chicken skin is exfoliation!). Set the chicken aside to drain while you prepare the aromats.

Take a thumb sized knob of ginger, bash it lightly with the base of a knife handle, just to break it slightly. Do the same with 2-3 cloves garlic. Place the ginger and garlic inside the chicken cavity, along with 2 stalks of spring onion. Cut off and reserve a small piece of chicken skin from the neck to cook the rice with. Rub the outside of the chicken with a teaspoon of sesame oil and a good seasoning of salt and white pepper and place in a deep pot. Cover with water and bring to the boil with the lid off.

Boil for 30-40 minutes on a gentle, rolling boil and then turn the heat off, cover with a lid and allow the chicken to sit in the water for a further 30 minutes. Remove, the chicken (reserving the cooking liquid) and refresh in cold water. Set aside to cool to almost room temperature, then rub with a few more drops of sesame oil and a sprinkle of salt.

Bring the cooking water to the boil, add a generous amount of salt and reduce by one third - this consomme can be served with the dish, or cooled and used as an Chinese accented chicken stock for soups (stores well in the freezer).

Meanwhile, in a frypan on a medium-high heat, place the reserved piece of chicken skin and allow to render the fat out. Smash a thumb sized piece of ginger and 2 cloves of garlic, add the to the pan along with 1 shallot stalk. Stir fry for 1 minute or until aromatic and then add in the thoroughly rinsed rice. Stir fry the raw rice to coat it in the fat and the aromats. In a rice cooker, transfer the rice and aromats. Add enough water from the cooking chicken to reach the first knuckle of your finger, from the top of the rice. Place the lid on and set to cook. 

Meanwhile, prepare the shallot and garlic relish/sauce. Peel and coarsely grate 2 thumb sized pieces of ginger, and finely chop about 3-4 cloves garlic. Reserve about 2-3 stalks of shallots, then top and tail the rest and then finely slice into rounds. Reserve a few coriander leaves for garnish, trim off the roots, then finely chop the coriander stalks and leaves.

In a saucepan on a low-medium heat, add 2-3 tablespoons grape seed (or any neutral oil like canola or sunflower) and about half a dozen drops of sesame oil. Add the ginger, garlic, chopped shallots and chopped coriander and stir regularly until the greens soften, but do not take on any colour. Season generously with salt, a good pinch of five spice powder and white pepper, to taste. Stores well in the fridge in a sterilised jar for up to a week and is great on sandwiches or stir fries. 

Once the chicken has cooled, carefully chop it up, trying to keep the skin on each part as intact as possible (half the pleasure of this dish is the skin). Serve the chicken with the rice, shallot and ginger sauce, a drizzle of kecap manis and sambal olek on the side, as well as the cucumber and tomato slices. 

(sorta) Chinese Chicken Stew

Chinese chicken stew.jpg

One of my favourite places to eat in Melbourne is Dainty Sichuan Hot Pot. There is nothing much better on a cold winter's night than sitting in front of a bubbling yin yang pot of aromatic stock, dipping your favourite meats and vegetables into the boiling broth, then slurping the flavour-laden soupy goodness at the end. My go-to broth at Dainty is spicy chicken; it's chock full of numbing Sichuan pepper, herbal ginseng and a tonne of chilli. I love it so much that I decided to use it as a basis of inspiration to make my (sorta) Chinese chicken stew. It's warming, aromatic, as spicy as you like it, and with the addition of fistfuls of Asian mushrooms and tofu, it's a comforting and substantial meal that will make your house smell brilliant and your belly happy. 

The process involves roasting and then stewing. Why the extra step? More flavour, la! While it's true that you could probably throw the chicken in and cook it down without the roasting step, all those roasty chilli flavours and caramelised chicken skin give a greater depth of flavour in the overall dish, plus you kind of get two recipes for one if you stop at the roasted chicken, so what's not to love?

Ingredients

For the Chinese roast chicken part

1 large brown onion, peeled and sliced into 1.5cm rounds

1 free range, organic chicken (you get what you pay for)

1 tablespoon vegetable oil

1/2 teaspoon sesame oil

1 thumb sized piece ginger, smashed

4-5 cloves garlic, smashed

2 star anise

1 tablespoon chilli flakes

1 teaspoon Sichuan peppercorns

1 teaspoon pink peppercorns

1/2 teaspoon white pepper, ground

2 long, red chillis, chopped in half, widthways

4-5 cloves, whole

For the stew

1 thumb sized piece ginger, finely chopped

2 cloves garlic, peeled and finely chopped

1/2 bunch coriander, trimmed and chopped (stems and leaves) - reserve some leaves for garnish

3 cups chicken stock

1 tablespoon Thai fermented chilli paste (or anything with a heap of dried shrimp and chilli in it)

1 tablespoons Lau Gan Ma chilli flakes in oil

2 teaspoons kecap manis

3 cups mixed Asian mushrooms (I like a combo of black fungus, shittake, enoki and shimeji)

1/2 block firm tofu, cubed into 1.5cm pieces

Steamed rice, to serve

Method

Chinese roast chicken.jpg

Preheat an oven to 200c. In a baking tray, place the onion slices evenly in the centre, as this will act as a trivet for your chicken (as well as add flavour). Thoroughly wash the chicken, pat the skin dry with paper towel and place the chicken on top of the onions. Pour over the vegetable and sesame oils and rub the entire outside of the skin, to evenly coat. Place the ginger and one star anise in the cavity and the garlic in the roasting tray. 

Sprinkle the chilli flakes and peppers, over the chicken, rubbing all over, to evenly coat. Throw in the remaining anise, fresh chilli and cloves into the baking tray and roast for 25-30 minutes, breast side up, until the skin is golden. Flip the chicken, continue to roast for 10-15 minutes, then turn down the heat to 170c and continue to roast for a further 20 minutes. Remove from oven and set aside until cool enough to handle. You could stop here, and you'd have a pretty cracking Chinese-spiced roast chicken, but we'll crack on, shall we?

In a casserole dish or heavy based pot on a medium heat, add a tablespoon of vegetable oil and the chopped ginger, garlic and coriander. Fry for 1 minute until aromatic, then add in the chicken stock. Once cool enough to handle, chop the chicken into pieces, discarding the central frame (leave the rest of the bones in, I think it gives the stew a better flavour but if you wish, you can remove the skin and meat from the frame and throw that in, sans bones).

Bring a kettle to the boil and pour about half a cup of boiling water into the roasting tray and use a spatula to scrape all the baked on flavours from the sides. Pour all of this spicy, chickeny goodness, along with any chunks of roasted onion and chilli, into the pot.* Place the roasted chicken pieces into the stock, along with the chilli paste (I'm obsessed with this one), chilli oil and kecap manis. Bring to the pot to a simmer, stir to combine and season to taste. After 5-10 minutes, add in the mushrooms and tofu, stir to combine, then reduce the heat and continue to simmer to reduce the stock to a thick, stewy consistency. Season to taste, then set aside to cool slightly. 
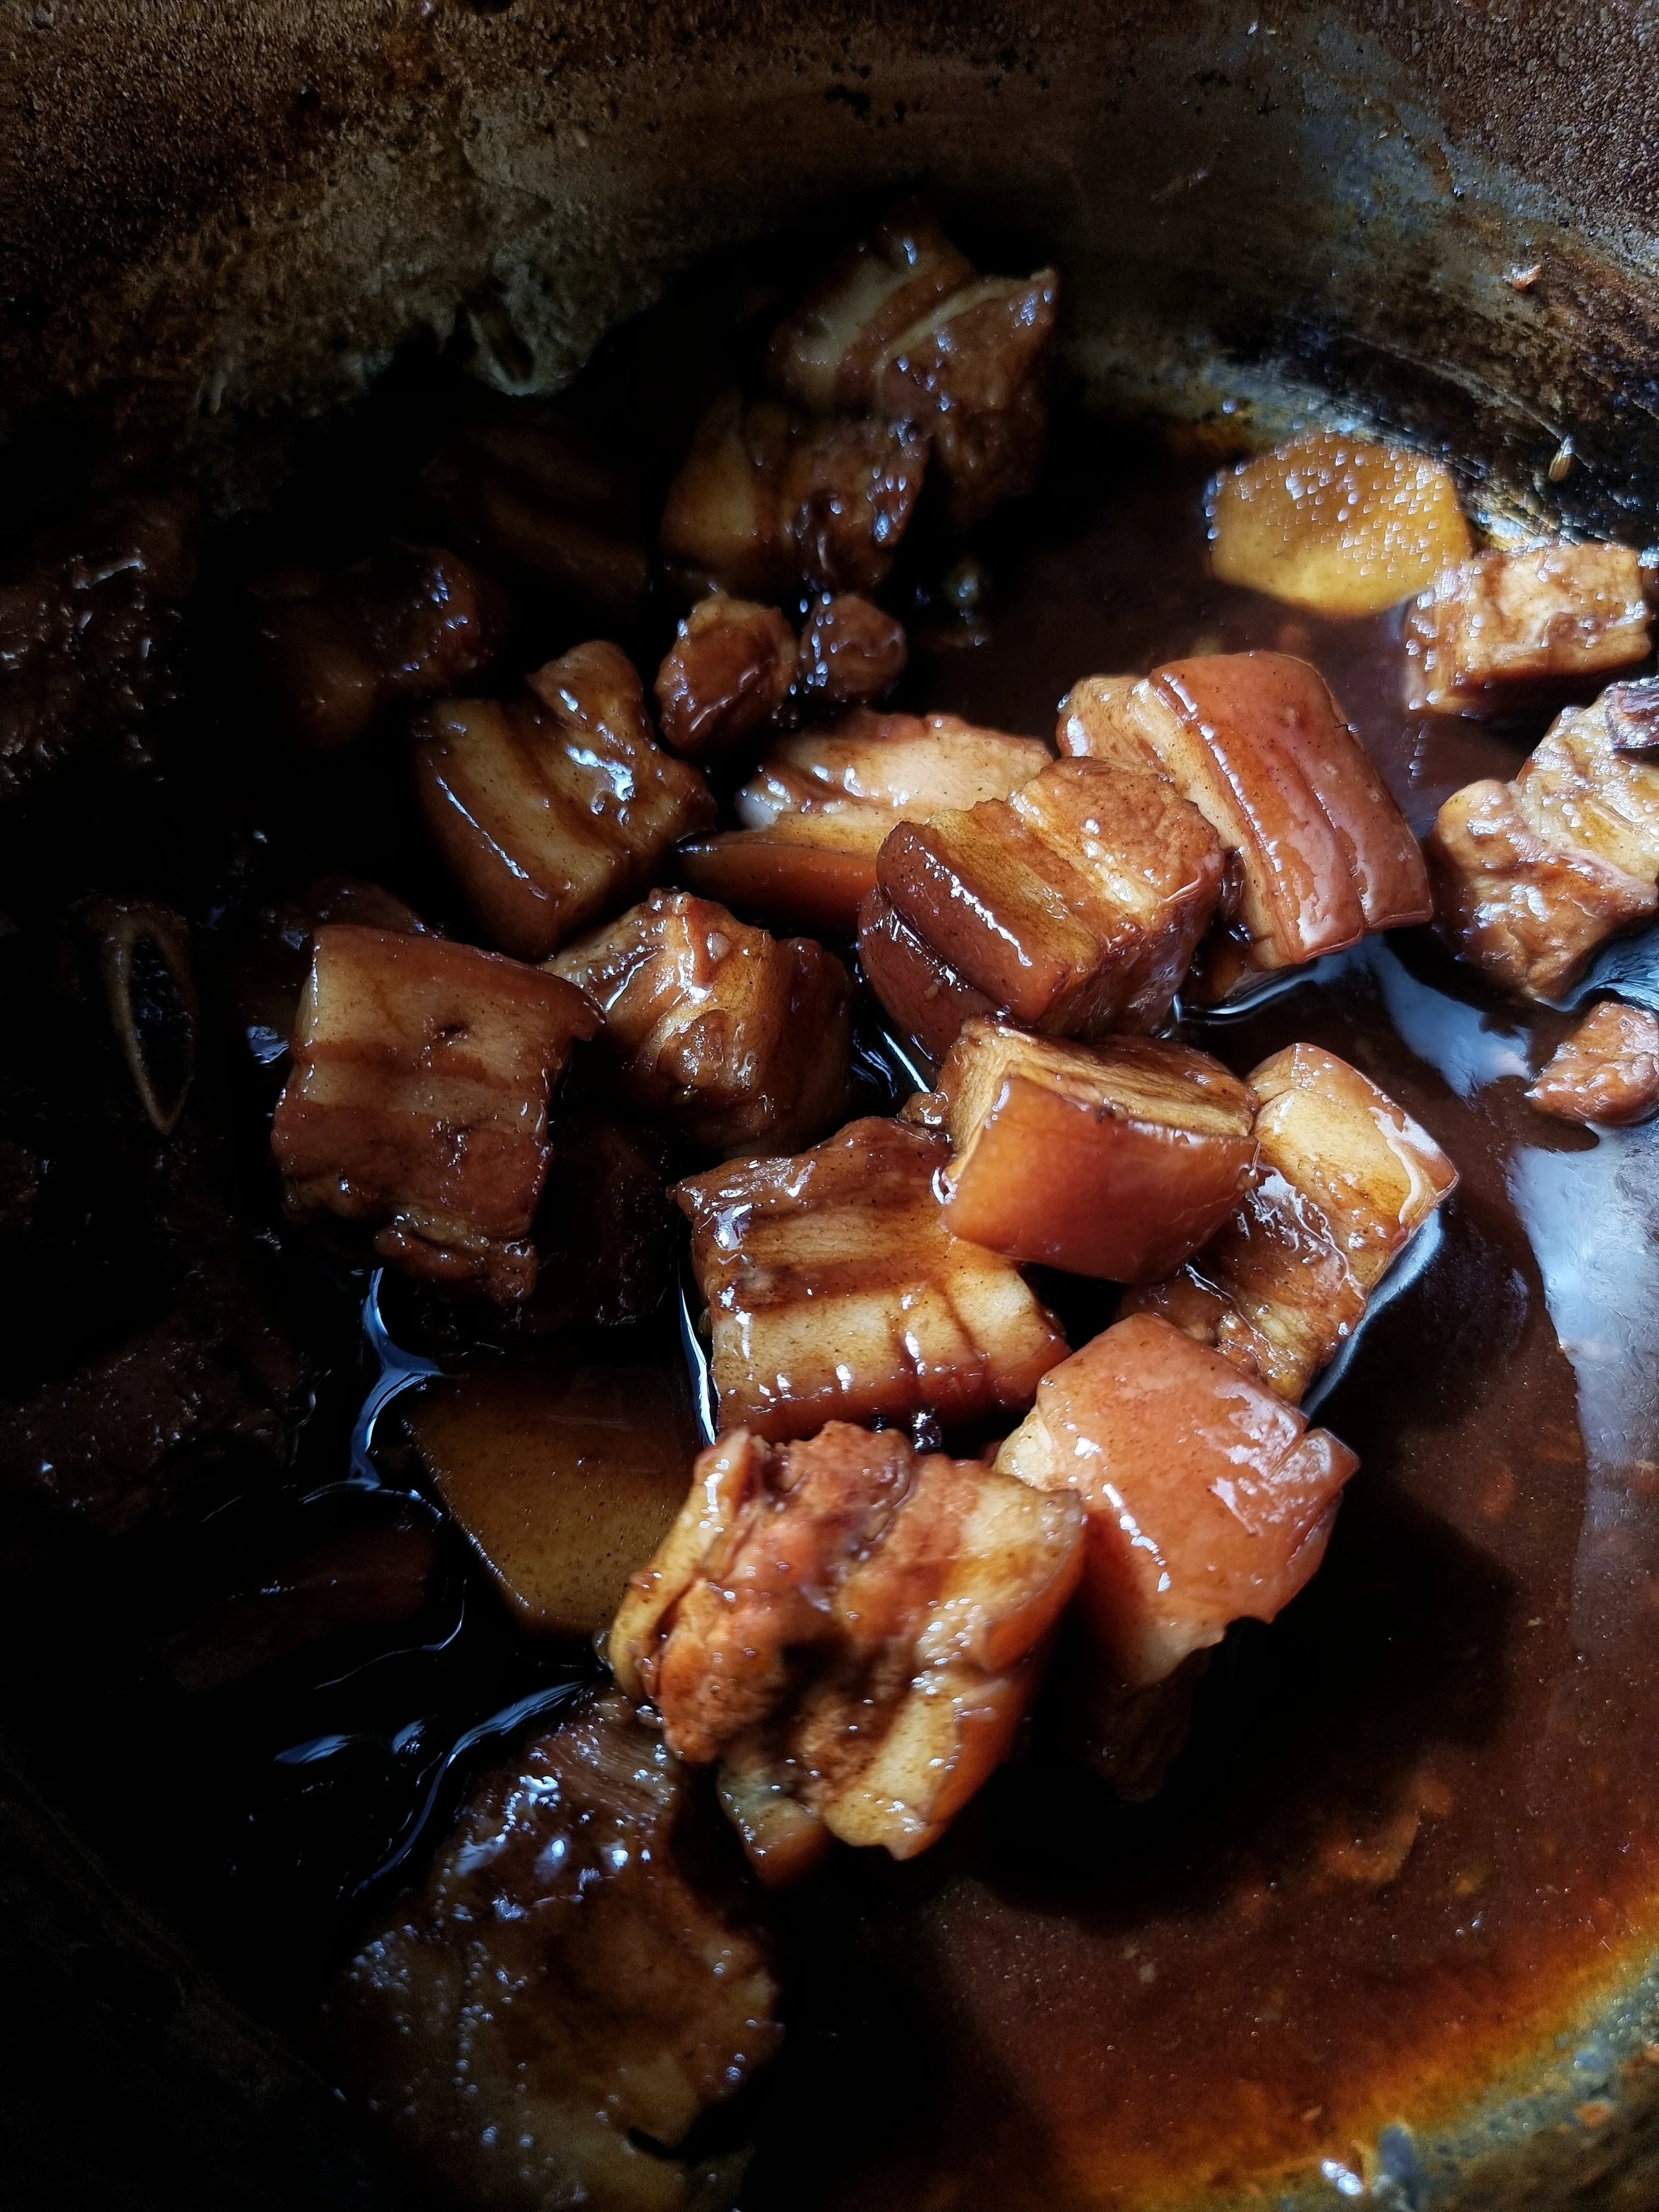
Serve with steamed rice, or if you like, mix the rice and the stew together, then serve. Garnish with fresh coriander. This will, as with any soup, stew or curry, taste better the next day. 

*This step will not only add a greater depth of flavour to your stew, but get you a head start on clean up.